Moshi! Moshi! 👩🏻🍳👩🏻🍳
.
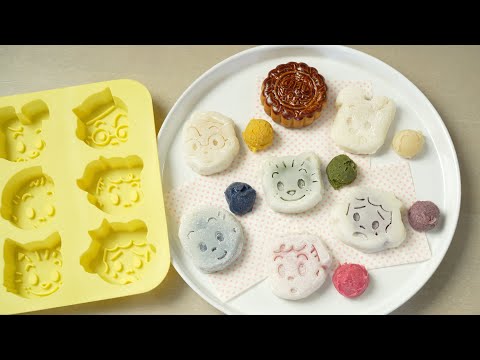
Do you want to have some Butter Mochi? Imagine biting into this soft, chewy, bouncy, little sweet bites of aromatic buttery mochi. 🤩🤩
.
Omg... I can’t stop popping them into my mouth one after another. Plus, it’s easy to prepare, let’s do it! 💥💥
.
I choose Anchor Butter because it’s rich in flavor, creamy in texture, and burst with buttery aroma giving superior sensorial experience in my mochi. 😋😋
.
Recipe: Anchor Butter Mochi
.
Ingredients:
2 tablespoons Anchor Butter (Salted)
1 bowl Glutinous Rice Flour
1 cup Sugar
1 cup Milk
.
Methods:
1. Add the glutinous rice flour, sugar, and milk. Then stir until the mixture blend well and smooth.
2. Microwave the mixture for 2 minutes at 600 watts.
3. Stir the mixture until it’s smooth. Add butter and stir it into the mixture until the butter is fully melted and blend well with the mixture.
4. Microwave the mixture at 600 watts for another 2 minutes. Then use silicone spatula to knead the mochi together.
5. Transfer the mochi into the square container lined with parchment paper. Press the butter mochi into the corners and flatten off the top. Chill the mochi in the refrigerator until its firm-up.
6. Cut it into bite-size pieces and dust each piece with flour. It’s ready to be served!
.
Anchor Butter is 100% Pure New Zealand Butter and made with fresh milk from Pasture-grazed cows in New Zealand. New Zealand Anchor butter is known for its natural golden colour. ✨✨
.
@anchordairymy
#DairyliciousMY
#AnchorDairyMalaysia
#SmoothLikeAnchorButterChallenge
#kellyskitchen
同時也有46部Youtube影片,追蹤數超過304萬的網紅MosoGourmet 妄想グルメ,也在其Youtube影片中提到,@リンネル チャンネル リンネル 11月号増刊 特別付録のオサムグッズのシリコーンケーキ型を使ってスノースキン月餅を作ってみました。見た目はスノースキン感は弱いですが、月餅🥮の型がなくても、シリコン型で作れたのがポイント。伸びのよい柔らかな餅皮とホワイトチョコのミルキー感がとっても合います。包みやす...
mochi recipe microwave 在 MosoGourmet 妄想グルメ Youtube 的最佳貼文
@リンネル チャンネル リンネル 11月号増刊 特別付録のオサムグッズのシリコーンケーキ型を使ってスノースキン月餅を作ってみました。見た目はスノースキン感は弱いですが、月餅🥮の型がなくても、シリコン型で作れたのがポイント。伸びのよい柔らかな餅皮とホワイトチョコのミルキー感がとっても合います。包みやすい餅皮なので同量の餡でも包みやすいです。型離れのポイントは打ち粉。片栗粉を型や餅皮の側面に多めに振ってください。くっつかずに作業できます。型に餅が貼り付き、1回、失敗してしまいました。
昔から大好きだったオサムグッズ。付録でシリコン型が手に入るなんていい時代なんだ。
*レシピ*(およそ64mlの型 6個分)
ホワイトチョコ餡を作ります
1.ホワイトチョコ 42gを溶かす。
2.白あん 150gを入れ混ぜる。
3.6等分にする。
4.お好みにパウダーで着色する。
今回、かぼちゃパウダー・紫芋パウダー・いちごパウダー 各2g、バタフライピーパウダー・抹茶 各1gで着色しています。もちろんそのままでもOKです。
5.ラップで丸く包み、冷蔵庫または冷凍庫で冷やしておく。
餅皮を作ります。
6.耐熱ボウルに白玉粉 24g、水 96gを入れ粒がなくなるまで混ぜる。
7.加糖練乳 24g、サラダオイル 24gと上新粉 24g、薄力粉 8g、上白糖 24gをあわせてフルイ入れ、泡立て器で混ぜる。
8.ふんわりラップをして、600wの電子レンジで50秒加熱し泡立て器で混ぜる。
9.その後、20秒加熱を3回繰り返し、その都度、泡立て器で混ぜる。
10.更に20秒加熱を3回繰り返し、その都度、今度はゴムベラで混ぜる。
11.更に今度はラップをしないで、1分30秒加熱し混ぜないでそのまま粗熱を取る。
12.片栗粉を広げたバットなどに(11)を6等分する。
13.ラップの間に(12)を伸ばす。
14.(5)を包む。
15.シリコン型に押し込む。
16.冷蔵庫で冷やす。
17.型から取り出す。
18.でけた。かわいいうまい。オサムグッズかわいい。永遠だな。
I made snow skin mooncakes using the silicone cake mold of OSAMU GOODS. It doesn't look like snow skin, but the key is that it can be made with a silicone mold even if you don't have a mooncake 🥮 mold.The milky texture of the white chocolate goes well with the soft and stretchy rice cake skin. Since it is a rice cake skin that is easy to wrap, it is easy to wrap even the same amount of bean paste. The key to mold release is flour. Sprinkle more potato starch on the sides of the mold and the rice cake skin. You can work without sticking. Mochi stuck to the mold and I failed once. I've always loved OSAMU GOODS. It's a good time to get a OSAMU GOODS silicone mold in a magazine freebie.
* Recipe * (for 6 molds of about 64 ml)
Make white chocolate bean paste.
1.Melt 42g of white chocolate.
2.Mix in 150g of white bean paste.
3.Divide into 6 equal parts.
4.Color with powder as desired. This time, I used 2g each of pumpkin powder, purple sweet potato powder, and strawberry powder, and 1g each of butterfly pea powder and matcha. Of course, you can leave them as they are.
5.Wrap in plastic wrap and chill in the refrigerator or freezer.
Make mochi skin.
6.Put 24g of Shiratamako and 96g of water in a heat-resistant bowl and mix until there are no grains.
7.Add 24g of sweetened condensed milk, 24g of salad oil, 24g of Joshinko, 8g of cake flour, and 24g of white sugar, and mix with a whisk.
8.Wrap it gently, heat it in a 600w microwave oven for 50 seconds, and mix it with a whisk.
9.Repeat heating for 20 seconds 3 times, mixing with a whisk each time.
10.Repeat heating for another 20 seconds three times, each time mixing with a rubber spatula.
11.Furthermore, without wrapping this time, heat for 1 minute and 30 seconds and remove the heat as it is without mixing.
12.Divide (11) into 6 equal parts on a tray with potato starch spread.
13.Spread (12) between sheets of plastic wrap.
14.Wrap (5).
15.Press into the silicon mold.
16.Chill in the refrigerator.
17.Remove from the mold.
18.It's done. Cute and delicious. OSAMU GOODS are eternal.
#SnowSkinMooncakes #recipe #月餅 #作り方 #オサムグッズ #リンネル #雑誌付録

mochi recipe microwave 在 MosoGourmet 妄想グルメ Youtube 的最讚貼文
9月21日は十五夜です。陽キャ顔の3Dうさぎさんとお月見はいかがですか?
*レシピ*(5ぴょん分)
1.耐熱ボウルに上新粉 100g、砂糖 40gを入れ混ぜる。
2.混ぜながら、ぬるま湯を少しずつ入れ、耳たぶくらいの固さにする。今回70g弱加えました。
3.ふんわりラップをして、600wの電子レンジで1分40秒加熱。白っぽいところが残っていたらザッと混ぜ、様子を見ながら加熱をする。今回、20秒追加加熱しました。
4.水で濡らしたすりこぎなどの棒で滑らかになるまでつく。
5.触れるくらいまで冷めたら、水で濡らした手で50回ほどこねる。
6.餅を5等分(1個 40g)にし、楕円に伸ばす。
7.耳になる部分を折り、切り込みを入れる。
8.お好みの餡を薄く塗る。今回はさつまいもの塩バター餡にしました。お餅が甘いので無くても大丈夫です。
9.餡を包む。切り込み部分の端が気持ち隠れるまで巻き込むとよいです。
10.海苔で顔を付ける。
11.でけた。
えらくポップなウサギさんになっちゃったけど、お月見を楽しみましょう。
September 21st is the full moon in Japan. How about moon viewing with a 3D origami rabbit with a cheerful character face?
* Recipe * (for 5 rabbits)
1.In a heatproof bowl, mix 100g of Joshinko and 40g of sugar. ( Joshinko : top-grade rice flour made from non-glutinous rice. )
2.While mixing, add lukewarm water little by little to make it as hard as an earlobe. I added a little less than 70g this time.
3.Cover with plastic wrap softly and heat it in a 600w microwave for 1 minute and 40 seconds.If any whitish areas remain, mix them briefly and heat while watching the situation. This time, it was additionally heated for 20 seconds.
4.Use a stick such as a wet pestle to pound the mixture until it becomes smooth.
5.When it is cool enough to touch, knead it with wet hands about 50 times.
6.Divide the rice cake into five equal portions (40g each) and roll out into an oval.
7.Fold the part that will be the ears and make a notch.
8.Spread a thin layer of your favorite bean paste. This time, I used sweet potato salt butter bean paste.The rice cake is sweet, so you can do without it.
9.Wrap the bean paste. It's best to roll it in until the end of the notch is hidden.
10.Put a face on it with nori (seaweed).
11.It's done.
It turned out to be a very poppy rabbit, but let's enjoy Otsukimi.
#月見 #餅 #うさぎ #Mochi #Rabbit #viewingthemoon

mochi recipe microwave 在 MosoGourmet 妄想グルメ Youtube 的精選貼文
I made a large fresh Daifuku filled with frozen "Petit Daifuku" (1kg!) from the Gyomu Supermarket.I used matcha green tea flavored fresh cream, so I never get tired of eating it. This is not a birthday cake, but a birthday Daifuku for someone who loves Japanese sweets! I want to give a big fortune ( Meaning of Daifuku ) and impact.
*Recipe* (for one 17cm diameter bowl)
1.Mix 6g of matcha, 40g of sugar and 40ml of fresh cream in a bowl over hot water.Matcha is less likely to get lumpy once it is sifted.
2.Pour 360ml of fresh cream into a bowl and add the cooled (1).
3.Cool the bottom of the bowl with ice water and whisk until stiff.
4.Spread out the plastic wrap in a 17cm diameter bowl.
5.Layer (3) with the petite daifuku. I used 25 pieces of petite daifuku.
6.Place in the freezer to cool and harden.
7.In a heatproof bowl, mix together 150g of joshinko (rice flour) and 60g of sugar.
8.While mixing, add 165g of lukewarm water, a little at a time, keeping an eye on it. I added a little less than 150g this time.
9.Wrap it softly and heat it in a 600w microwave for 2 minutes and 30 seconds.If any whitish areas remain, mix them briefly and heat while watching the situation.This time, it was additionally heated twice for 30 seconds and 20 seconds.
10.Pound the mixture with a wet pestle until it becomes smooth.
11.When it is cool enough to touch, knead it with wet hands about 50 times.
12.Put the mochi between two sheets of plastic wrap and stretch it out. It was quite difficult.
13.Take (6) out of the bowl and wrap it with (12).
14.It's done. For a while, this Daifuku will be my daily snack.
You can freeze the whole thing, so if you can't eat it all, freeze it and enjoy it.
業務スーパーの冷凍『プチ大福』(なんと1㎏入り)を中にいっぱい詰めた大きな生大福を作りました。生クリームを抹茶味にしたので食べ飽きない味になりました。和菓子好きなあの人の誕生日ケーキならぬ誕生日大福!大きな福とインパクトをプレゼントしたい。
*レシピ*(直径 17㎝のボウル 1個分)
1.抹茶 6g、砂糖 40g、生クリーム 40mlを湯煎しながら混ぜる。抹茶は一度ふるうとダマになりにくいです。
2.ボウルに生クリーム 360mlを入れ、冷ました(1)を入れる。
3.ボウルの底を氷水で冷やしながらかために泡立てる。
4.直径 17㎝のボウルにラップを敷き込む。
5.(3)とプチ大福が層になるように重ねる。プチ大福は25個使いました。
6.冷凍庫で冷やし固める。
7.耐熱ボウルに上新粉 150g、砂糖 60gを入れ混ぜる。
8.混ぜながら、ぬるま湯 165gを少しづつ様子を見ながら加える。今回150g弱加えました。
9.ふんわりラップをして、600wの電子レンジで2分30秒加熱。白っぽいところが残っていたらザッと混ぜ、様子を見ながら加熱をする。今回、30秒・20秒と2回追加加熱しました。
10.水で濡らしたすりこぎなどの棒で滑らかになるまでつく。
11.触れるくらいまで冷めたら、水で濡らした手で50回ほどこねる。
12.ラップに挟んで餅を伸ばす。結構大変でした。
13.ボウルから取り出した(6)を(12)で包む。
14.でけた。しばらく3時のおやつは、この大福ですわ。
まるまる冷凍できるので、食べきれない分は冷凍して楽しんでください。
#ジャイアント #大福 #業務スーパー #作り方 #IceCreamDaifuku
